Protected Files
Onsite File Protection
This tutorial is for Onsite (On Server) File Protection. If you are looking for Remote File Protection, click here.
Onsite File Protection Overview
FastMember Onsite File Protection gives an easy to use, secure way for you to host protected files on the WordPress installation which can only be viewed or downloaded by authorized users such as members of your website.
Setting up Onsite File Protection add on
Setting up this add on is quick and easy. Follow the steps below and you will have it set-up in no time.
Step 1
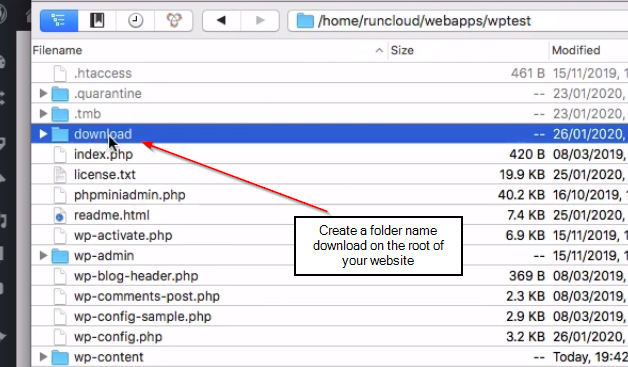
Login to the root directory of your website using sftp/ftp and create a folder named ‘download’.
Step 2
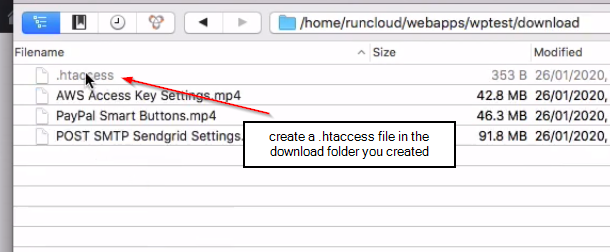
Inside the ‘download’ folder create a file named ‘.htaccess’.
Step 3
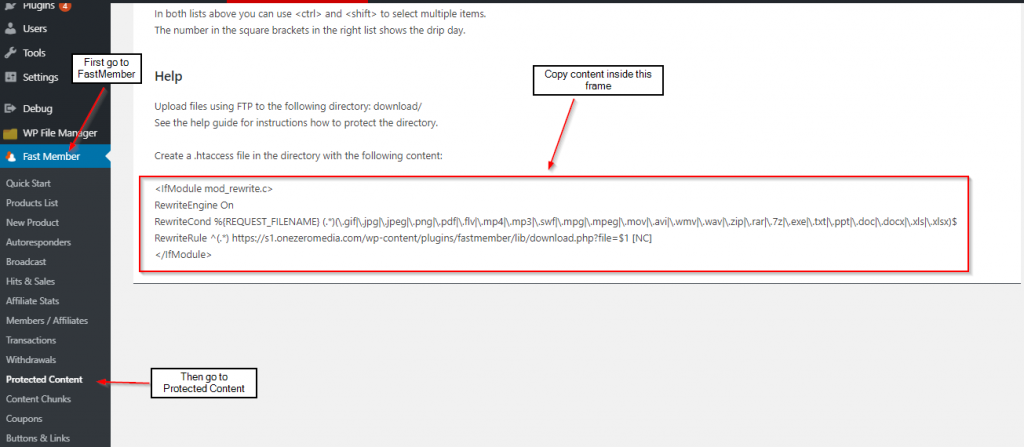
Go to FastMember Protected Content, select any product from the product list and click on ‘Protected Files’ tab. Scroll down to the bottom and copy the code.
Step 4
Paste the lines you copied inside the ‘.htaccess’ file and save.
Adding Files as Protected Content
Any file that needs to be protected must be copied into the ‘download’ folder which was created on the root of the website.
Only the files that are added to the ‘download’ folder will be listed as eligible files on the ‘Protected Content’ tab in FastMember Content Protection page.

Assigning Privileges to Membership products
Assigning privileges to different membership products using the FastMember Onsite File Protection is as easy as picking the membership product and assigning files that members of that membership product can view.
The steps below will guide you through assigning files to membership products.
Step 1
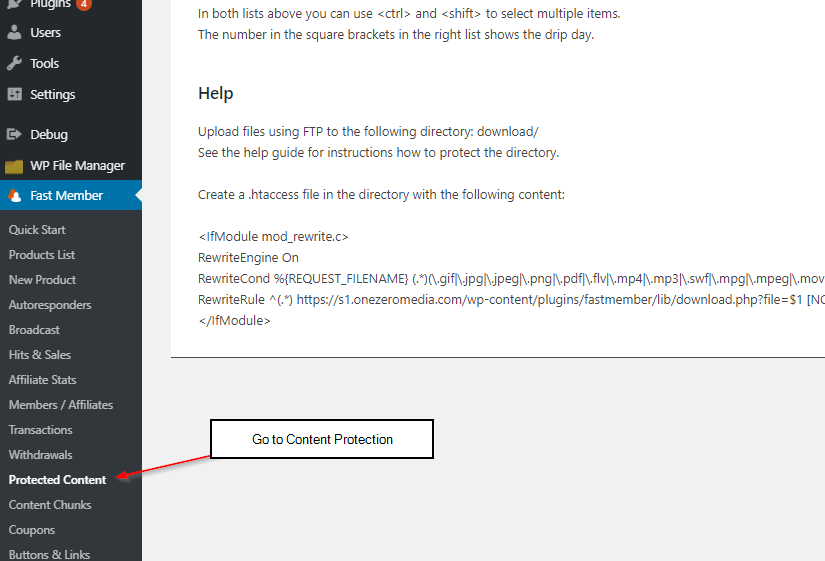
Go to the Content Protection page on the FastMember menu.
Step 2
Select the product from the products list you wish to assign file access privileges.
Step 3
Navigate to the ‘Protected Content’ tab.
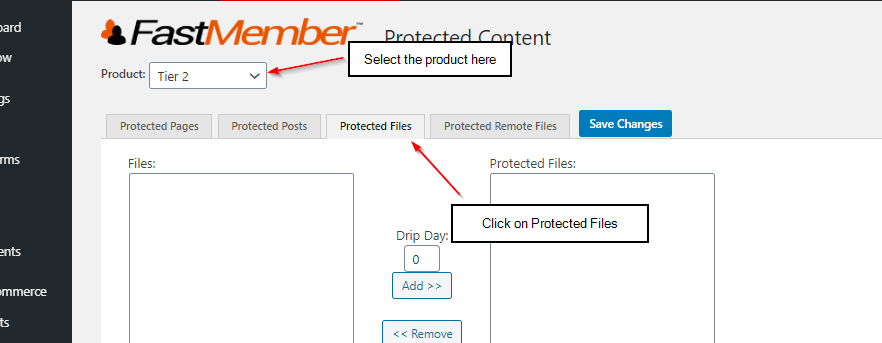
Step 4
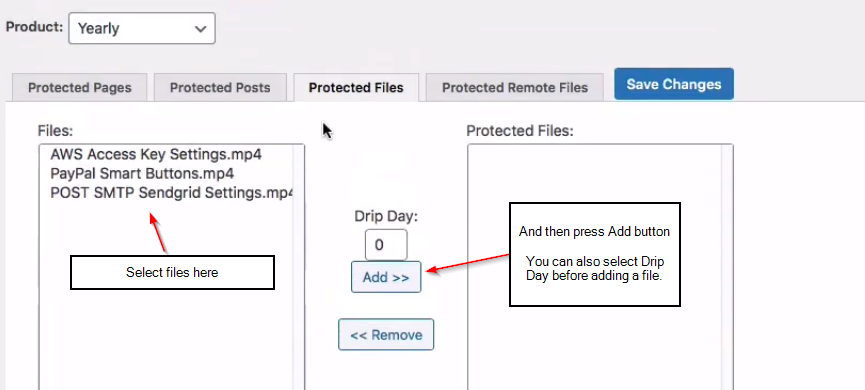
Select the files you need to provide access to and move them to the ‘Protected Files’ box. Finally save the changes.
Drip Day feature will allow you to decide how long a member has to be registered for before he gets access to the file.
As an example, if you only want to grant members who have been registered for thirty days, simply enter 30 on the field, before adding the file to the ‘Protected Files’ box.
Adding the files to a web page is similar for all protected content. It is described here on Adding Protected Files To A Page tutorial.
Feel free to let us know if you have any issues or concerns using any of our products by reaching us through the support page.
