Fast Active Campaign Overview
Fast activecampaign seamlessly integrates your Activate Campaign account to your WordPress website for easily Syncing ActiveCampaign Contacts With Your WordPress Users and direct user tagging integration through the Fast Flow Dashboard.
Installing Fast Active Campaign add on
Installing Fast Active Campaign is the same as installing any other Fast Flow Add on. The steps below will guide you through installing the Active Campaign add on.
Step 1
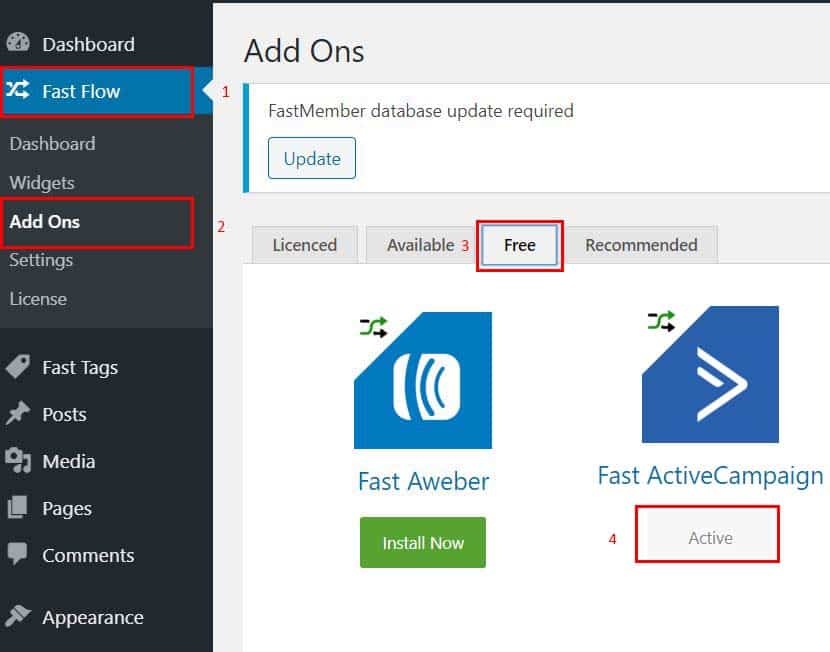
On your site, go to the Fast Flow menu and click on Add Ons.
Step 2
Navigate to the Free tab and click ‘Install Now’ button below Fast ActiveCampaign.
Setting up Fast Active Campaign add on
To sync WordPress website with ActiveCampaign you need to get the API URL and the API Key from ActiveCampaign and add it to the Fast ActiveCampaign add on. Getting the API details and adding it to Fast ActiveCampaign is fast and easy.
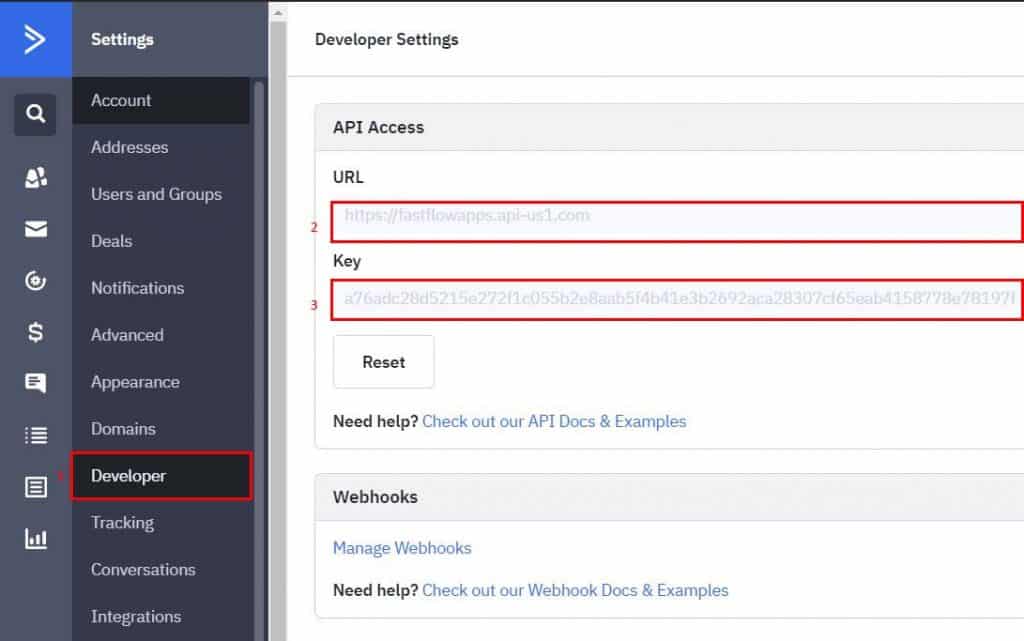
Step 1
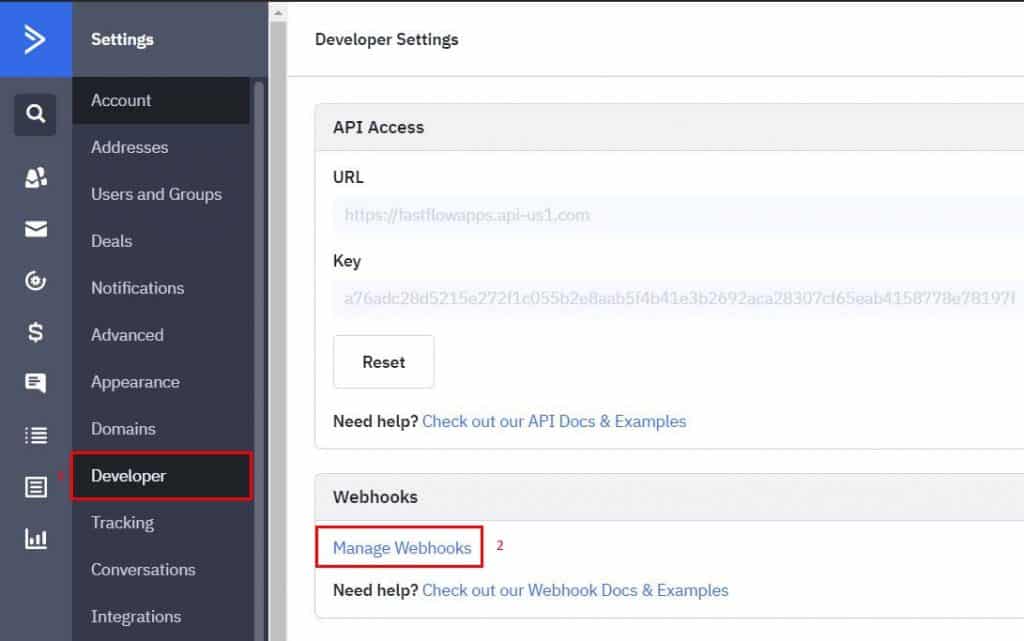
Open ActiveCampaign, go to settings page and click on Developer settings tab.
Step 2
Copy the URL and the key.
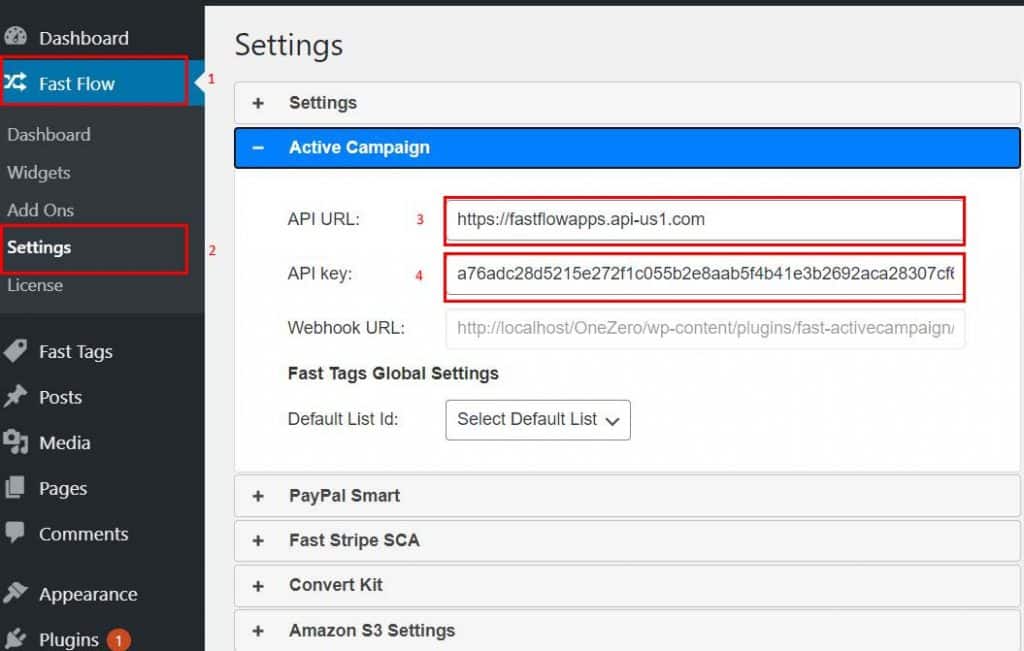
Step 3
Hover over the FastFlow icon on the left column and click on Settings.
Step 4
Expand Active Campaign tab. Insert the copied URL to API URL field and key to the API Key field then click save settings.
That should complete the integration of Active Campaign.
Using Autoresponder with a FastMember product to populate lists in Active Campaign
By using the autoresponder feature with Fast ActiveCampaign in FastMember products you can automatically sync new customers to a list on Active Campaign. The steps below will guide you on setting up Active Campaign syncing on a FastMember product.
Step 1
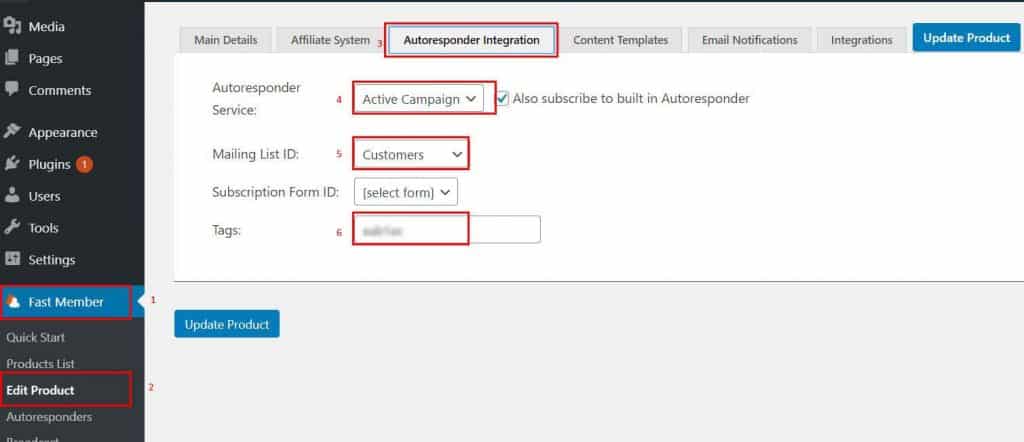
Go to FastMember products list and click on the product that will sync the new users with Active Campaign.
Step 2
Navigate to the Autoresponder Integrations tab.
Step 3
Select Active Campaign as the Autoresponder Service.
Step 4
Select the mailing list where clients will be added to who signs up on this specific product.
Step 5
You can also insert a tag where users who sign up on this product will be tagged in Active Campaign.
Synchronising tags from Active Campaign to Fast ActiveCampaign
By adding a webhook to Active Campaign, you can import all your tags in Active Campaign to Fast ActiveCampaign. The steps below will guide you through adding a Fast ActiveCampaign webhook to Active Campaign developer settings.
Step 1
Go to settings in FastFlow, expand Active Campaign tab and copy the Webhook URL.
Step 2
Open Active Campaign, go to settings and click on Developer settings.
Step 3
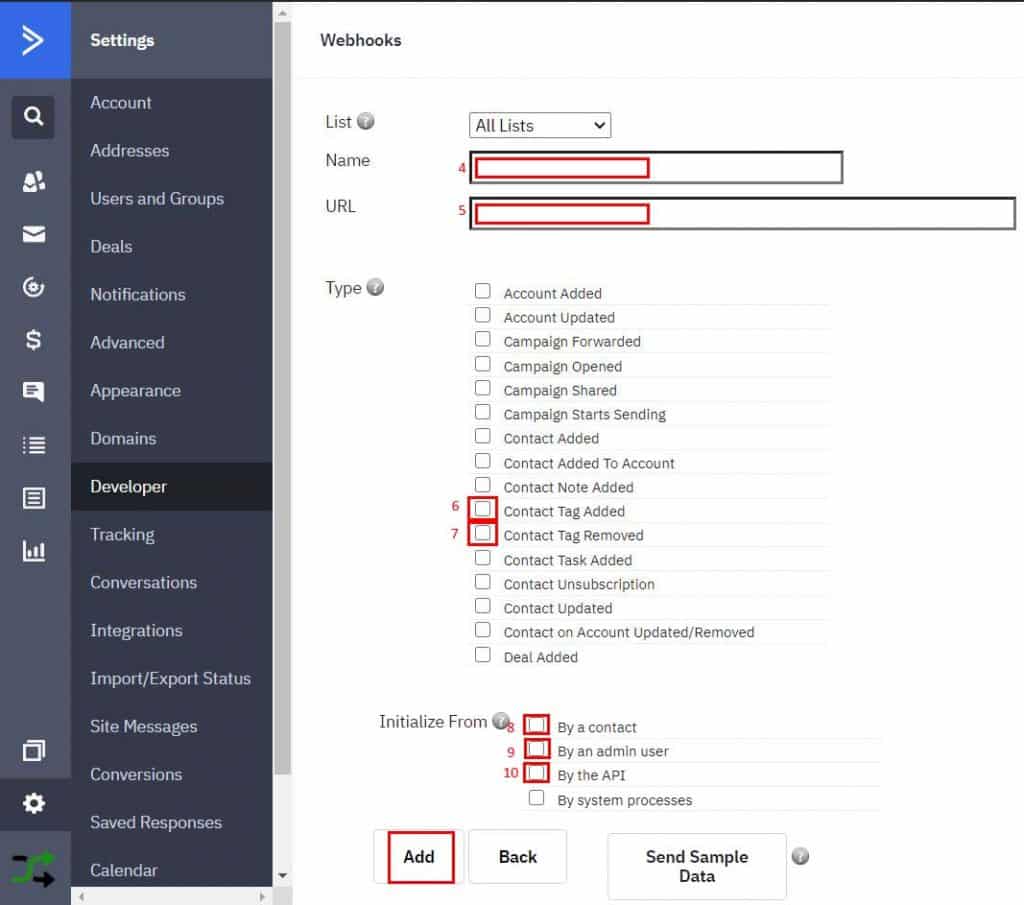
On the Developer Settings page click on Manage Webhooks and then click Add.
Step 4
Enter a name for the webhook, the URL you copied in the step 1.
Step 5
For Type, select ‘Contact Tag Added’ and ‘Contact Tag Removed’.
Step 6
For Initialize from, select ‘By a contact’, ‘By an administrator’ and ‘By the API’.
Testing Fast ActiveCampaign add on
To test the Fast ActiveCampaign plugin you need to configure the settings and sign up a new user on the product that you configured Fast ActiveCampaign for.
Step 1
Follow the tutorial to configure Fast ActiveCampaign add on and a product list for Active Campaign.
Step 2
Go to the sign up page of you website and sign up a test user for the product that you configured Active Campaign for.
Step3
Go to the Active Campaign list you configured and check if the user entry has been added there. If you’ve added a tag while setting up Fast ActiveCampaign, that tag should be added to Active Campaign list too.
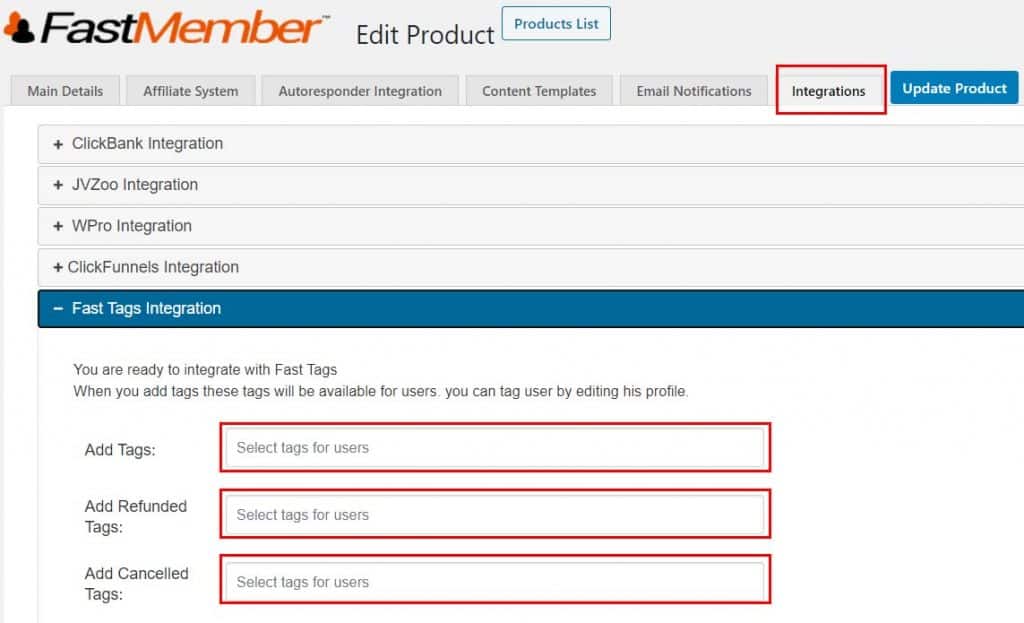
Fast Tags with Fast ActiveCampaign
In addition to selecting the Fast ActiveCampaign tag from the auto integrations page, a user can also choose to manually create tags and assign them to a product.
This can be useful if you want to synchronize tags for refunds and cancellations of any products.
Adding a new tag to a FastMember product using Fast Tags
To add a new tag to Fast Tags, simply follow the steps below.
Step 1
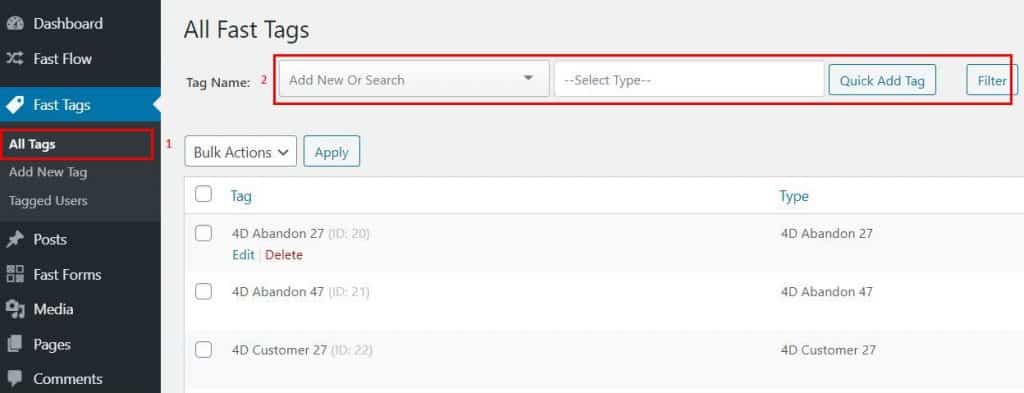
Go to Fast Tags and click on All Tags.
Step 2
On the Add New or Search box on top just enter the Tag name and press enter.
Step 3
Go to the FastMember product you wish to assign the tag for.
Step 4
Go to integrations and expand the Fast Tags Integration tab.
Step 5
Assign the tag.
Step 6 (Optional)
Go back to Fast Tags and click on the Edit Tag. Here, select Active Campaign List. By performing this optional step you are telling Fast Tags to insert whatever product to tag with to a specific list on Active Campaign.