Fast ConvertKit
Fast ConvertKit is designed to work seamlessly with both the Fast Flow Dashboard and Fast Member
Once your contacts have been added to WordPress you now have the ability to sync their Fast Tags and Fast Member purchases.
Fast Tags can be used to trigger automation on any other integrated platform which is supported by our growing number Fast Flow addons.
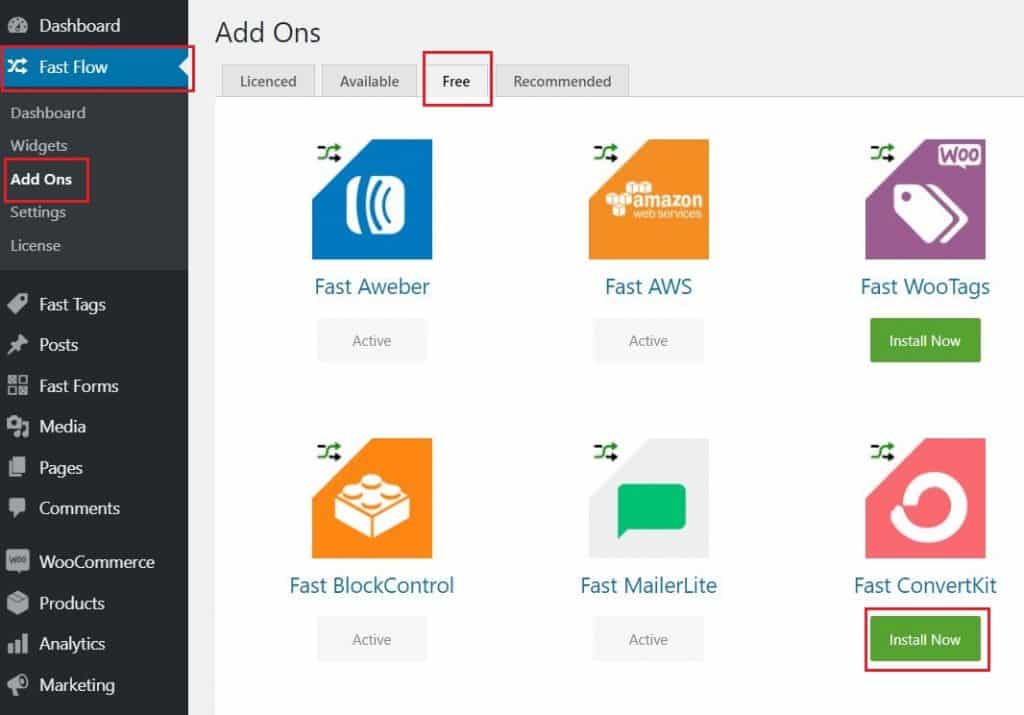
How to install the Fast ConvertKit add-on
Step 1
Navigate to the FastFlow add-ons, click Free tab. Select Fast ConvertKit and click Install Now.
Step 2
Go to FastFlow settings on the dashboard, Click Fast ConvertKit.

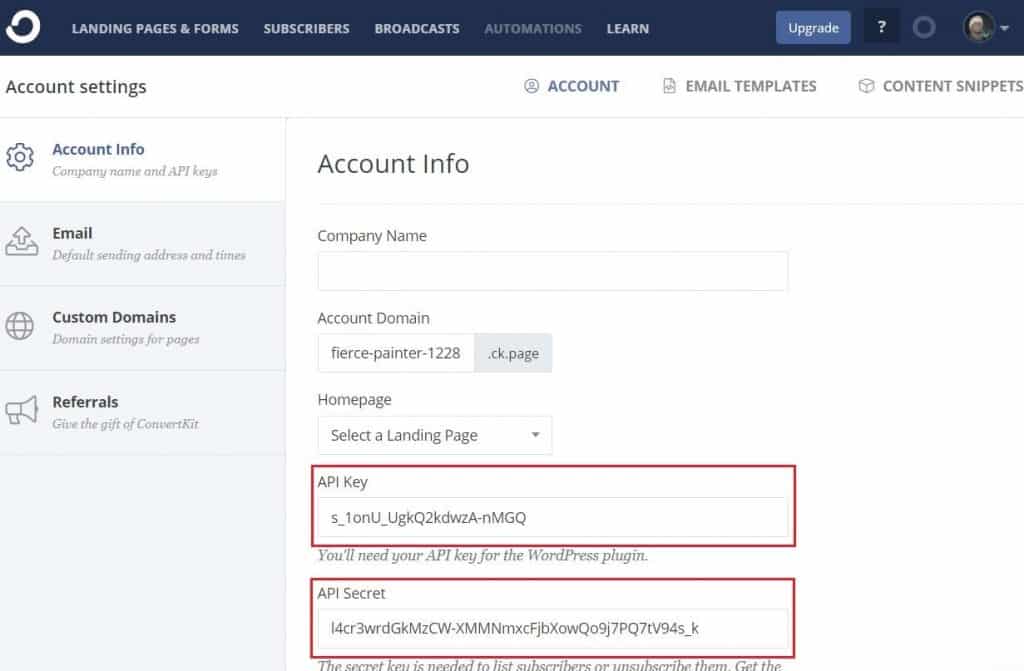
Step 3
Log on to ConvertKit account, Click profile and select Account Settings, Copy the API key & Secret Key.
Step 4
Go back to Step 2, then paste the API key & Secret Key and Save Settings.
How to Integrate with a FastMember product
Step 1
Go to FastMember products list and click on the FastMember product you want to integrate with ConvertKit.
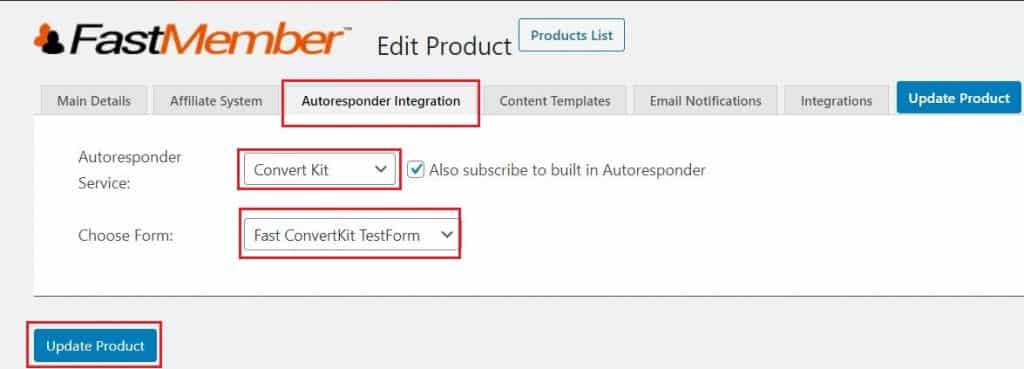
Step 2
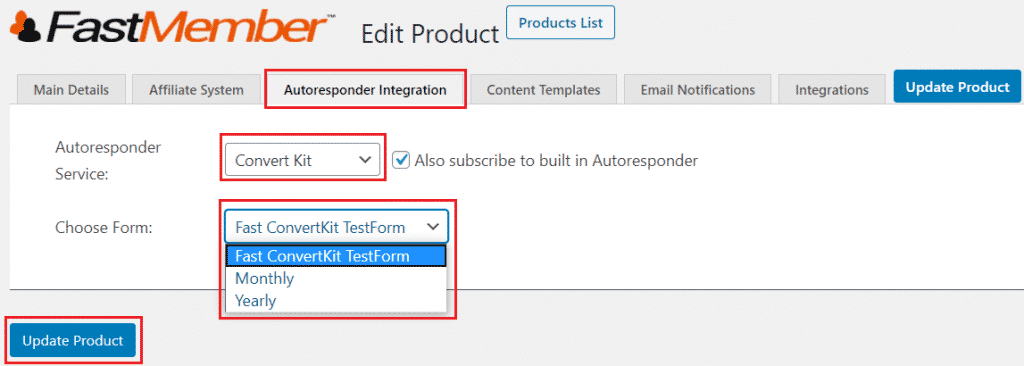
Go to the ‘Autoresponder Integration’ tab.
Step 3
Select Convert Kit as the autoresponder service and choose the form you wish to populate in ConvertKit.
Step 4
Optionally, you can synchronize Fast Tags with ConvertKit as well. To do that, simply go to the ‘Integrations’ tab, maximize the ‘Fast Tags integration’ section and set the tag.
Step 5
Click Update Product.
Testing ConvertKit Integration
Step 1
Visit your website as a non-member and sign up for that product.
Step 2
Go into your email confirmation and confirm your subscription.
Step 3
Log on to ConvertKit, Click Subscribers menu and you can see the new user added.
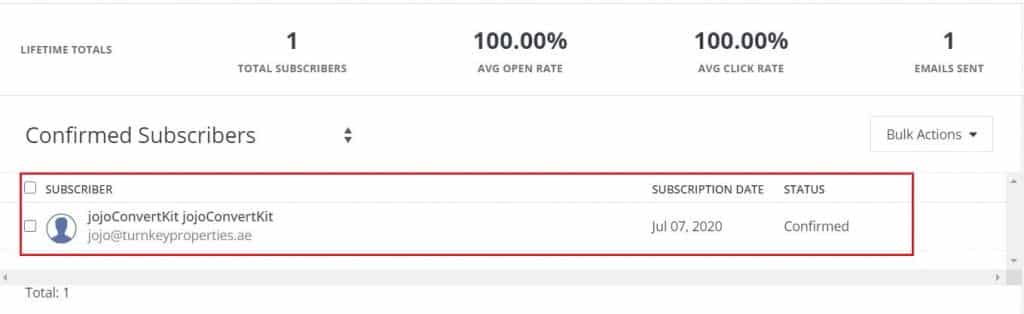
Step 4
Click on the new user added to confirm the details especially the Forms tab to check if it was synced.

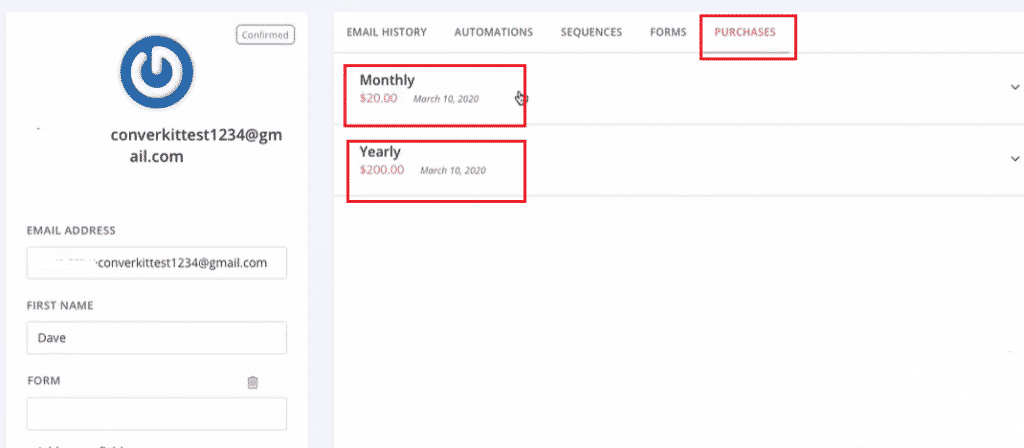
Ecommerce Reporting
You can set up ConvertKit to work within purchases with Fast Member and Fast Flow once a user makes a purchase and appears inside ConvertKit on the Purchases tab.
Ecommerce reporting is automatically enabled when sending purchases over, you simply need a form created for each product within ConvertKit.
Once this is done setup the Fast Member products as follows:
Step 1
Make sure that Autoresponder integration is set to ConvertKit.
Step 2
Choose Form for each of the Fast member products (i.e Free, Monthly, Yearly)
Step 3
Optionally, you can synchronize Fast Tags with ConvertKit as well. To do that, simply go to the ‘Integrations’ tab, maximize the ‘Fast Tags integration’ section and set the tag.
Step 4
Click Update Product.
Step 5
Visit your website as a non-member and sign up for each product.
Step 6
Log on to ConvertKit, Click Subscribers menu and check Purchases tab for the user.