Regardless whether it is on-server protected content or remote hosted protected content, process of adding them to a web page is the same. The steps below will guide you on adding a protected file to a web page.
Before following this tutorial, you should have already added files as protected content. If you have not, please go through our On-Server Protected Content tutorial or Remote Hosted Protected Content tutorial first.
Adding a Single Protected File to a Web Page
Step 1
Edit the page you want to add the content to.
Step 2
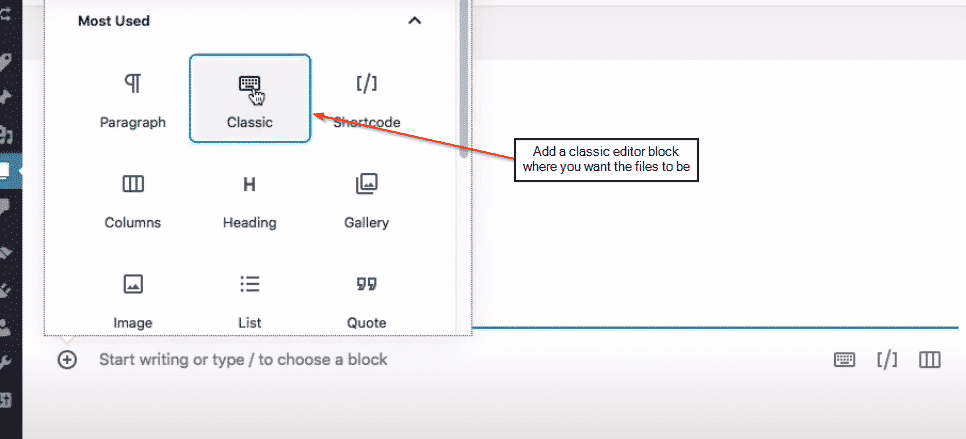
Add a Classic Editor block where you want the download link to be.
Step 3
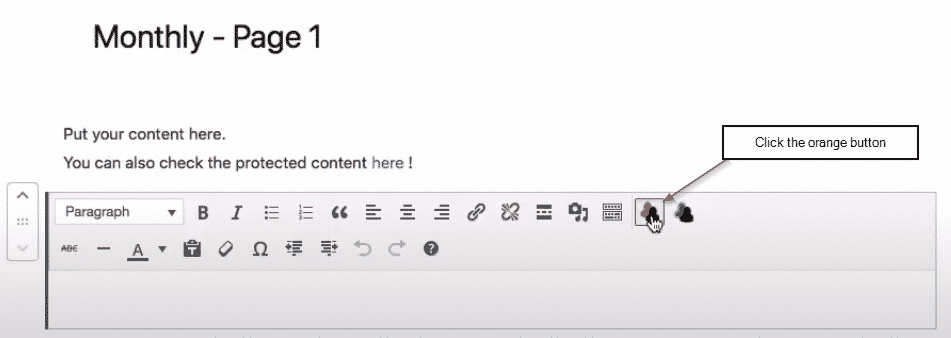
Click the orange ‘FastMember Product and Content’ button.
Step 4
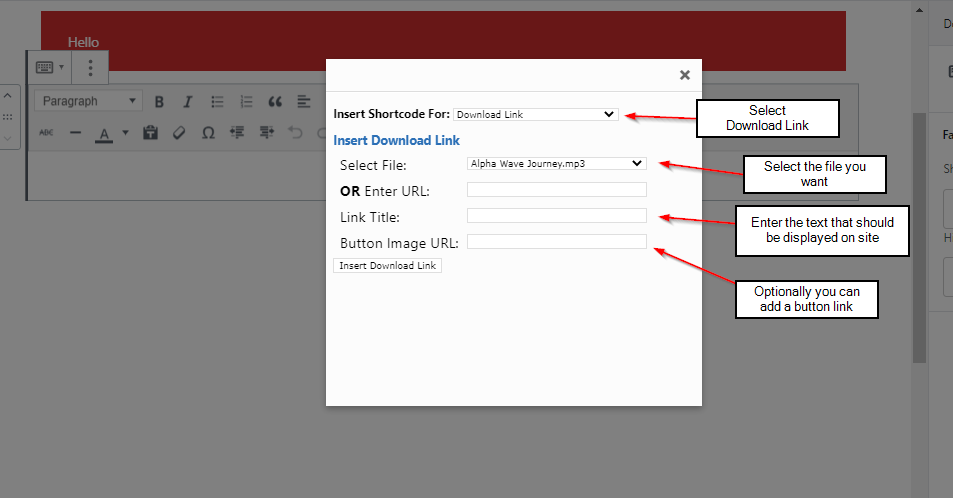
Select ‘Download Link’ under the ‘Insert Shortcode For’ section and fill the details as below.
Select File: File that you need to insert and protect
Link Title: Text that will be visible to the visitor
Button Image URL: Optionally you can insert a button URL here.
Now you can publish and test the page.
Adding Multiple Protected Files using Download Lists and Metadata
Rather than adding protected content one by one, you can create a dynamically displayed list of downloads using Metadata and the ‘Download All’ short code.
The steps below will guide you on setting up a dynamic list of downloads. Steps 2-4 are similar as adding a single file.
Step 1
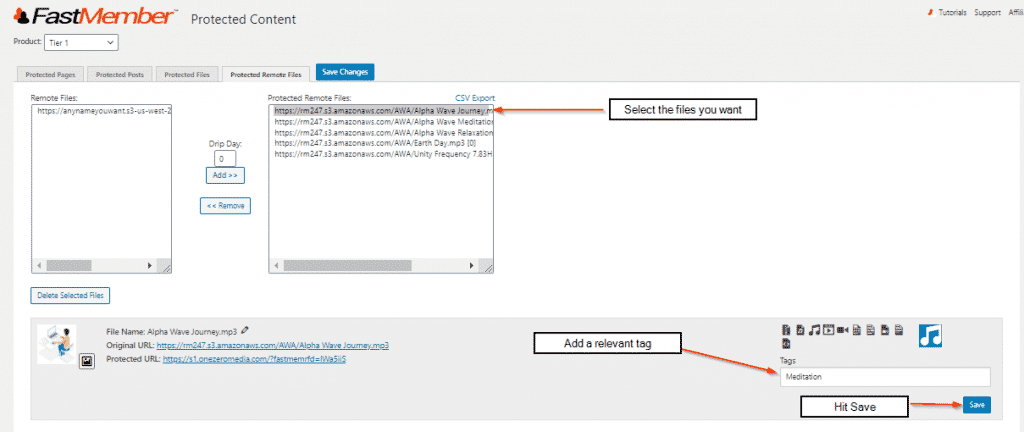
Go to Files you want to add by navigating to FastMember > Protected Content > Product and add tags as metadata.
As an example, if you want file a and file b to be on the same list, you add a similar tag to them both.
Steps 2-4 are similar to adding a single download link. Please refer to the previous tutorial above if you need more details.
Step 2
Edit the page you want to add the content to.
Step 3
Add a Classic Editor block where you want the download link to be.
Step 4
Click the orange ‘FastMember Product and Content’ button.
Step 5
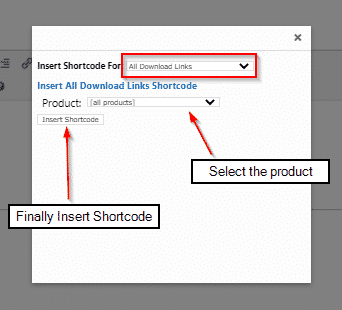
Select ‘Download All links’ option, select the product and click ‘Insert Shortcode’ button
Now you have added all the download links related to a product, however you can filter these download links by Fast Tags and display a selection of links only. For that follow step 6.
Step 6
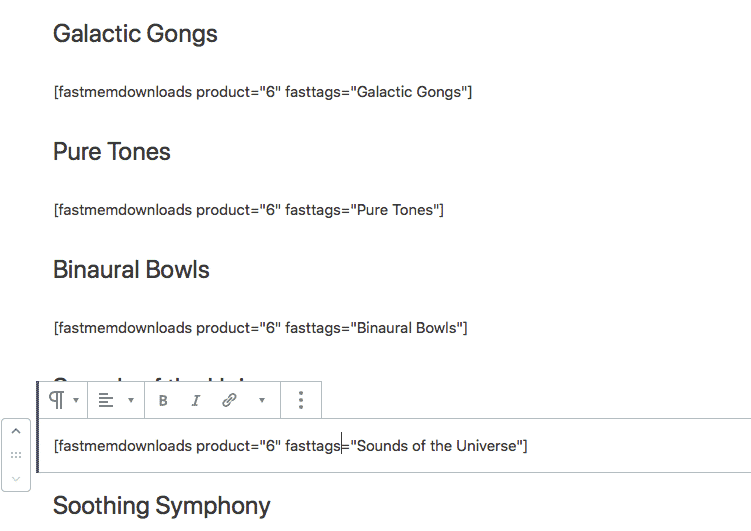
Modify the added shortcode and insert the fasttags=’tagname’.
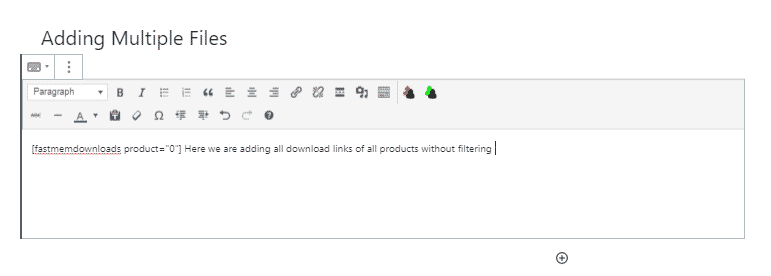
Example: if the added short code is (where all download links of all products are added without filtering):
[[fastmemdownloads product=“5”]]
modify it to be (where filtering is applied by the tag “Pure Tones”):
[[fastmemdownloads product=“5” fasttags="Pure Tones"]]
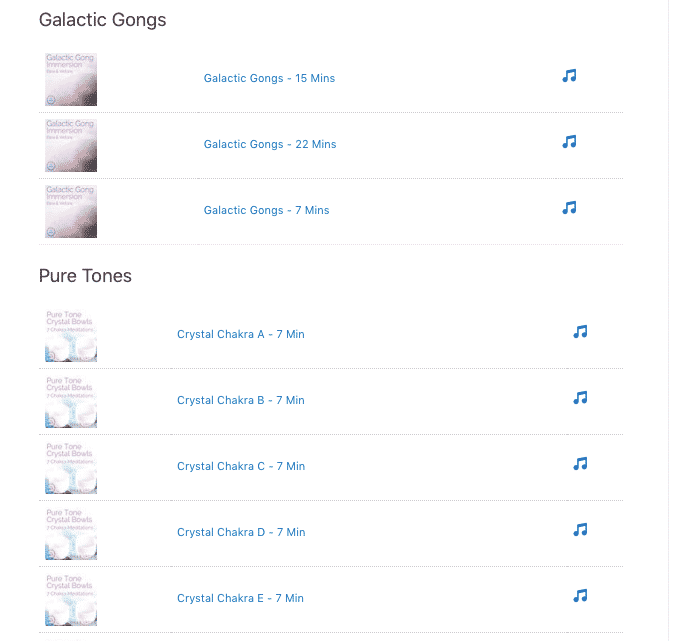
Below is an example of an added code and the result generated by the shortcode:
Changing non-member / expired member redirection
When a ‘Non Member’ or ‘Expired Member’ tries to access content that is protected then Fast Member will perform one of the following ‘non member actions’.
Show Default Signup/Login Message – If they do not have access to that product then a default message will be displayed
Custom Message – You can display a customised message for each Non Member / Expired Member status to those members
You can also redirect the user to a landing page of your choice.
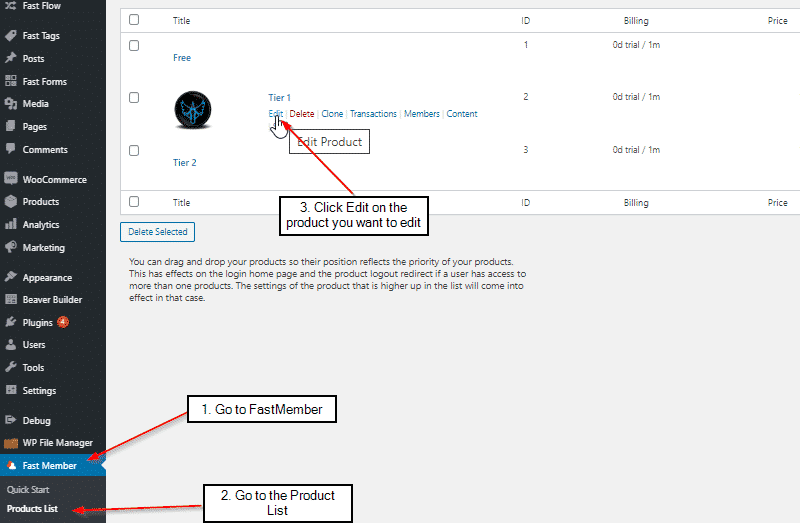
Step 1
Go to FastMember, Product List and then click edit on the product you wish you change settings on.
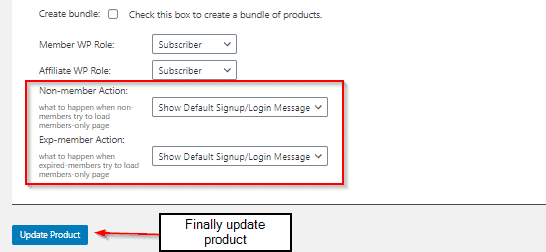
Step 2
Scroll down to the bottom of the page to Non-Member action and expired member action. Change them according to your requirement.
Options are:
- Redirect to the login page
- Redirect to the sales page
- Show custom message
- Show default signup/login message
- Redirect to a page/post